Thursday, April 28, 2011

Plans for the upcoming month(s)....

So I have alot I'd like to attempt this month so stay tuned! First things first is the cloth diapering of my 11 month old. Wish me luck! My cousin mailed me out a few gbaby diapers and I think a few others and I think my husbands cousin may be sending me a few fuzzibunz to try out. The goal is to figure out which I like best, and then make the switch. Not only to I always try to be more frugal, but If I can be environmentally conscious at the same time, then that's the route i'm taking.
Izzie and I have made a few plans for her home schooling for the next month. I think I will post the completed lesson plan on here next week. One option was to focus on learning about different countries around the world "Around the world in 30 days" if you will. The goal would be to boost cultural awareness and acceptance through learning utilizing art, math, music, food, books, and games. Any suggestions are always welcome.
I'm going to go ahead and put it out there, Im also going to TRY to be pretty ambitious on the homemade front. I launched Little Bugs Boutique last week, and have a few example items up for sale on the facebook page. obviously i'm going to try to keep adding to that this month if our budget allows me to purchase a few supplies. Im also going to be trying a number of recipes for homemade items that I have come across and I'll go ahead and let you guys know how they all work out so if you'd like to attempt it also you can, of I can let you know how awful things turn out and try to spare you the trouble.  if anyone has tried any of these things already I would love to hear your personal experience.

All Homemade from scratch :)

dishwasher detergent
Household cleaners (I already use a homemade wood polish, counter cleaner, and stainless steel cleaner,
                               which I will also share)
Graham crackers
Ritz crackers
saltine crackers
butter
mayonaise
dog treats
croutons
marshmallows
ricotta cheese
cinnamon raisin bread


I feel ambitious :) Anyone else try any homemade recipes that are awsome? anyone ever make yogurt? Thants one i;d like to try too but im a little scared to.
I mentioned to my husband that if we had our own house i would love to have egg laying hens. just 3 of them. he looked at me like i was crazy. Its not the first time ive mentioned it, but i think he was surprised that i haven't given up on the idea.  He begged that i don't stop shaving my armpits, come to think of it, id save alot of money on razors......... hehehehe lol

Wednesday, April 27, 2011

Easy AND Delish Homemade bread


I don't have a breadmaker. I wish I did, but I don't. I love making a good homemade bread, and absolutely nothing can compare to the smell of fresh bread baking. The recipe below is the one that I learned on. It was the first bread I ever made by hand, and it is still one of my all time favorites! Its got a bit of a crusty top, but a smooth soft center. yum! 
Ingredients

3/4 cup warm water
1 pkg active dry yeast
1 tsp salt
1 1/2 tbsp sugar
1 tbsp vegetable shortening
1/2 cup milk
3 cups flour (approx.)

In large mixing bowl, mix yeast in warm water, stirring until completely. Add salt, sugar, shortening, and milk. Stir. Add 2 cups of the flour and mix well using hands or a mixer with bread hooks. Add flour until a cohesive dough forms, and the dough "chases" the mixers. Put dough in a buttered bowl turning so the top of the dough is also greased. Cover bowl with damp hand towel and let rise for 1 hour. After letting dough rise, punch it down in the bowl, then place it on a flowered surface and knead well. Place formed dough into a buttered bread pa. Cover again and let rise for 30 minutes. Uncover and score the top of the dough 3 times. Bake in preheated oven at 375 degrees for 30-45 minutes until browned.


Tuesday, April 26, 2011

Dont forget the basics....

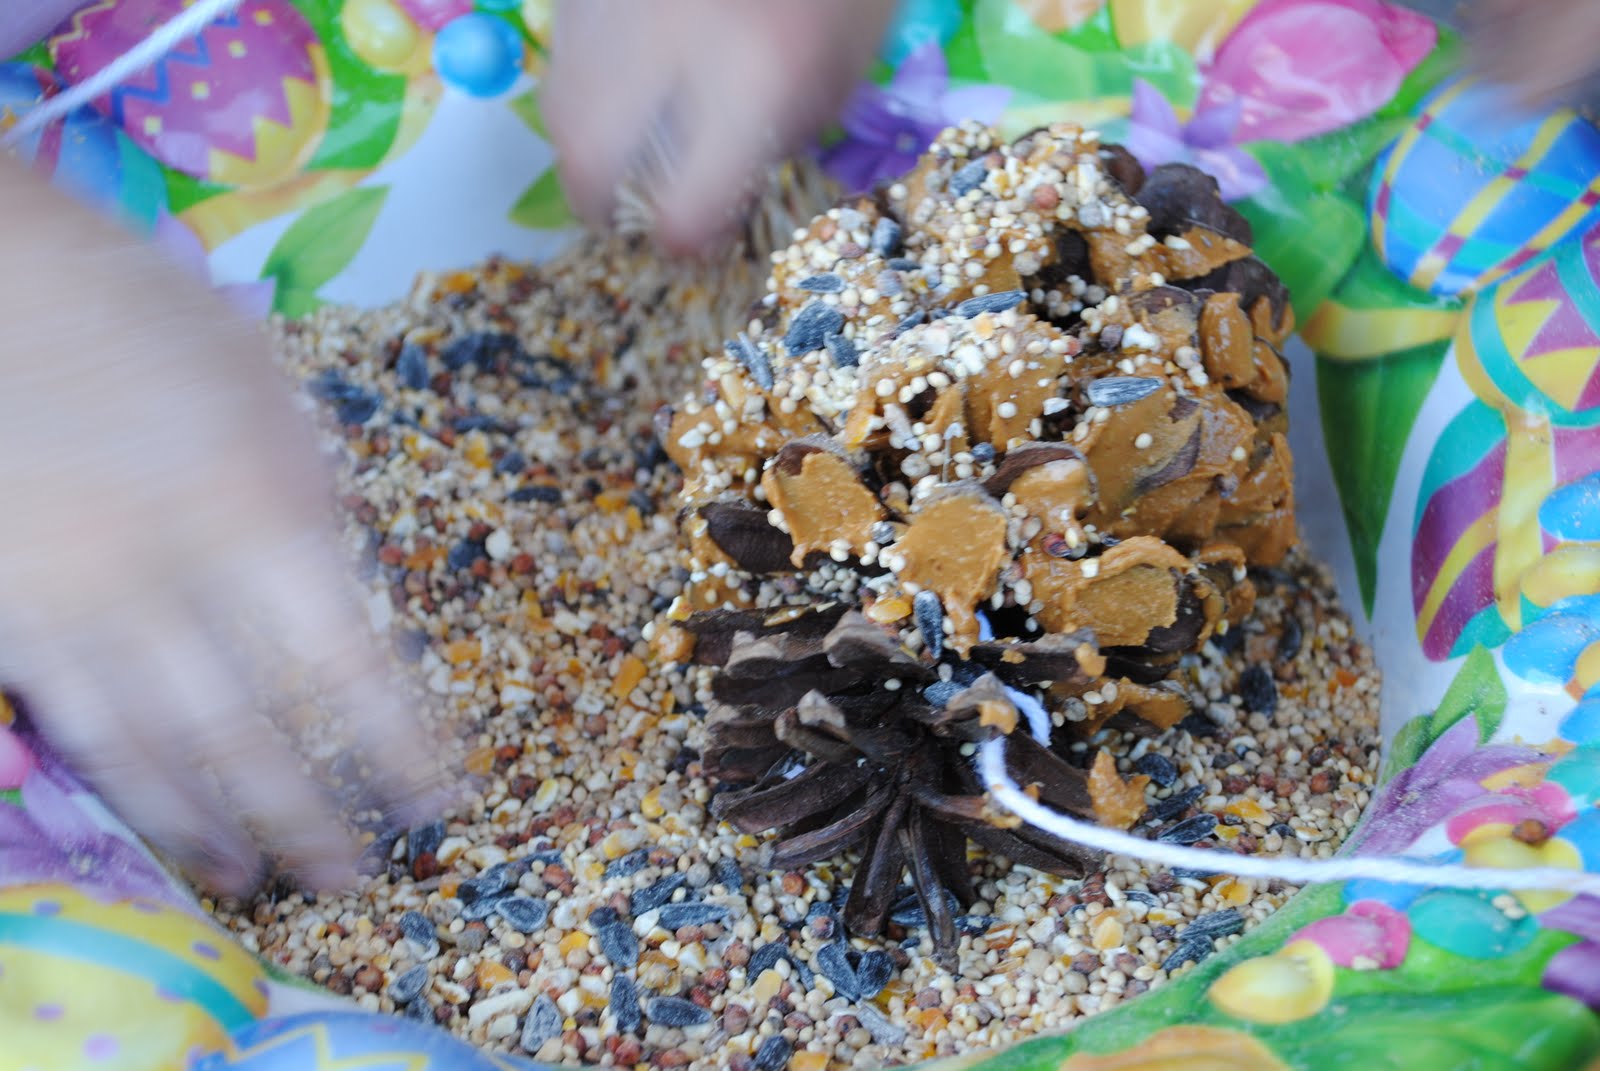
 This past week I took a trip down memory lane. One of the most basic kids crafts/activities that there is. The pine cone bird feeder. My daughter, Izzie and her 2 best friends were so excited when we did these, I explained the project then sent them off in search of pine cones. When they got back and we were slathering on the peanut butter and making a huge birdseed mess all over my porch, the neighbor kids started gathering. They were asking what we were doing. Apparently most of them (not all) had never seen this basic project done. I was shocked. Me and my Izzie do this every summer. Its one way we ring in the warm weather, and bird watching season... I would never miss it, no matter how messy. The point here, don't forget the basics. Today is a day where memories are made. What kind of memories are you leaving your children?

The girls were so proud of their work!

Easter Sucess!!!!

Easter dinner was a total sucess! It was awesome! I picked up a bone-in shank portion on sale for $1.16/lb. I have never prepared one of these before, normally opting for the spiral sliced pre-cooked variety. When I opened it up IT HAD SKIN! EW!!!! I was completely grossed out. Ok, deep breath, we can deal with this. So I cut the skin and peeled it off, exposing mass quantities of fat. Ok, next hurtle. So i cut off all the fat that i could. Alright, that wasn't so bad. Pretty simple actually. Now I can handle this. I was a little worried that without the skin it could be dry, but I slow cooked it with a honey glaze and it was great! tasted delish! So here's the recipe for you!
Honey Glazed Shank Portion Ham

Ingredients

1 (5 pound) shank portion ham
1 cup brown sugar
2 cups honey
2 tbsp butter

Preheat oven to 275 degrees. Place ham in foil lined pan (you DEFINITELY want foil). Cook ham for 5 hours in oven. After ham slowcooks, in a small saucepan heat the brown sugar, honey, and butter. Add about 1/2 cup of the pan drippings to the glaze. Brush glaze over the ham. Put back in oven and set to 325 degrees for additional 1 hour, basting every 20 min. Cover loosely with foil to prevent burning if it starts to get too brown. ENJOY!


My other big success were my pull-apart herb biscuits. they are wonderful. Recipe as follows:

Ingredients

1 tube refrigerated buttermilk biscuits (grands size)
1/3 cup butter, melted
3 tbsp grated parmesean cheese
1 tbsp sesame seeds
1 tsp minced garlic
1 tsp dried parsley flakes
1 tsp dried basil
1 tsp dried oregano
1 tsp dried thyme

separate biscuits and cut into quarters. In an ungreased round pan, 9-in (i use a metal pie pan combine remaining ingredients and mix together. Add biscuits and toss to coat. Bake at 450 degrees for 8-12 min, until golden brown. Invert on plate to serve :)

Cheezy Black Bean and rice dinner/dip


Ok, so my pantry is empty...sad day to cook dinner for me. what to cook? well my husband is in the field training for a few days so its just me and the minions. SO, what i did was just throw together all that junk that sits in the back of the pantry. The result? Yummy :) The kids showed it down. I served this as a dip with tortilla chips. a bit more fun, but it could definitely be a beans and rice main course.

2 tbsp olive oil
1 can black beans, mostly drained
1 can Rotel
1 can corn
1/2 cup finely chopped onion
1/2 cup chopped red pepper
1/2 cup chopped green pepper
1 garlic clove minced
1 chicken breast, cooked and shredded
1 tsp chili powder
4 cups cooked white rice
1/2 cup shredded cheddar cheese
crushed red pepper as desired for spiciness

Heat oil on med-high skillet. Add onion, peppers, garlic, corn, and Rotel and simmer until soft. Remove from heat. In med saucepan mix together all ingredients. Heat stirring frequently. Serve. HA! easy as that. Plus yummy. next time your pantry is running low, or even when its not, you could try this!

Thursday, April 21, 2011

Homemade Peanut Butter Eggs


So Today I tried to make homemade Cadbury eggs from the instructables site. It was a disaster. A melty sticky, messy horrible disaster. I couldn't make them into eggs. It was gross. Plus, personally, I don't think they were that yummy.....HOWEVER, these turned out really yummy.  I used the stuff I had on hand to play around with peanut butter. I saw a few different recipes for these online, but I mixed them all up, did my own thing and voila! Just promise me one thing...don't ask how many calories are in them. I don't know, and don't wanna :)
Ingredients

8 oz powdered confectioners' sugar
1/2 cup creamy peanut butter
2 tbsp butter - room temperature
1/2 tablespoon milk
1/4 tsp vanilla extract
1/2 a package of  semi-sweet chocolate chips
1 tsp shortening  
 

In a medium mixing bowl, combine together powdered sugar, peanut butter, butter, vanilla extract and milk until blended. Put Shape mixture into small egg shapes (makes about 12).  Freeze peanut butter eggs for 1 hour. 

Melt chocolate into in double boiler with shortening or put in microwave for short bursts stiring frequently until melted and smooth.  Stick a skewer (I used a metal one for kebabs) in peanut butter egg and dip it in chocolate using a spoon to make sure it is covered. Place on metal baking sheet and use spoon to smooth out top covering skewer hole. While still wet you can add sprinkles. Place in refrigerator to set. once fully set you can decorate with icing if desired :) Yummy!


Shaped Peanut Butter Eggs

Dipped

ready to set, i used the muffin pan to keep them separate.


Wednesday, April 20, 2011

Roll-up Place Matt


Rolled up place mat.
 I am grossed out. Every time we go out to eat if they dont provide one of those little kids meal menu/place mat things what are you supposed to do? I decided to get crafty with this little problem.No more baby eating off gross nasty table! Unfortunately i didnt actually take pictures as I went along, it was what i like to call "craft vomit". "Craft vomit" is something that happens suddenly, unplanned, and with no thought. Sometimes it works out, sometimes its a huge disaster. Fortunately for me, this time it worked out great. When I make my next one I'll take step by step photos. Until then, I found something similar at My Patchwork. Its a little different, but you get the idea! I used double wide bias tape to edge the whole thing and pre-sewed the pocket before attaching it to the place mat. To finish it off i added a leaf detail to the ties. By the way, did you know that place mat is two words? thank you spellchecker for showing me that! HA! learn something new everyday... Anyhow, It was pretty simple, like I said before, ill update this with a step-by-step later!